The following photos are supported with a short explanation of the whole process of making 3d structure and printing it.
You should create your attaching components on Fusion 360, or another 3d modelling
program. There are tutorials online on how to use these programs.
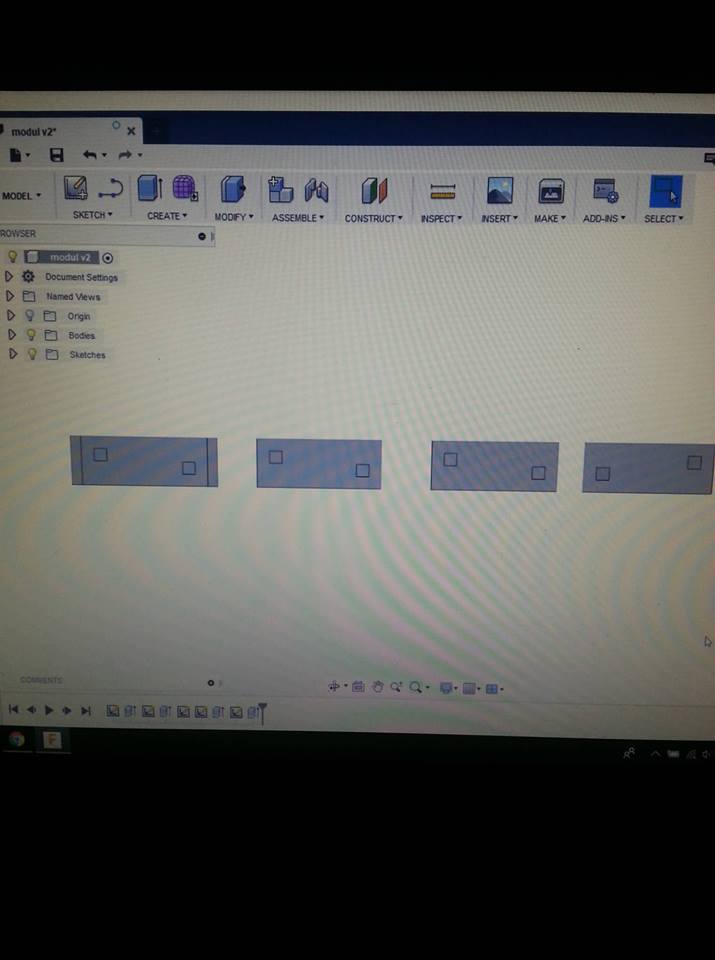
On the photo are shown the attaching components I have created.
in order to attach the parts to each other we need a passive part
(with holes) and an active part/s (with feet to go in the holes).
keep in mind that 3d printing is an addative process when making
the feet and the holes. I would suggest using tolerance parameter.
The tolerance parameter can be calculated as half of the nozzle size.
You should also keep in mind that the placement of the feet should be
mirrored to be placement of the holes, just so they can fit.
Another tip I can give is that round connections are way better
than square ones because of the sharp corners of the squares.

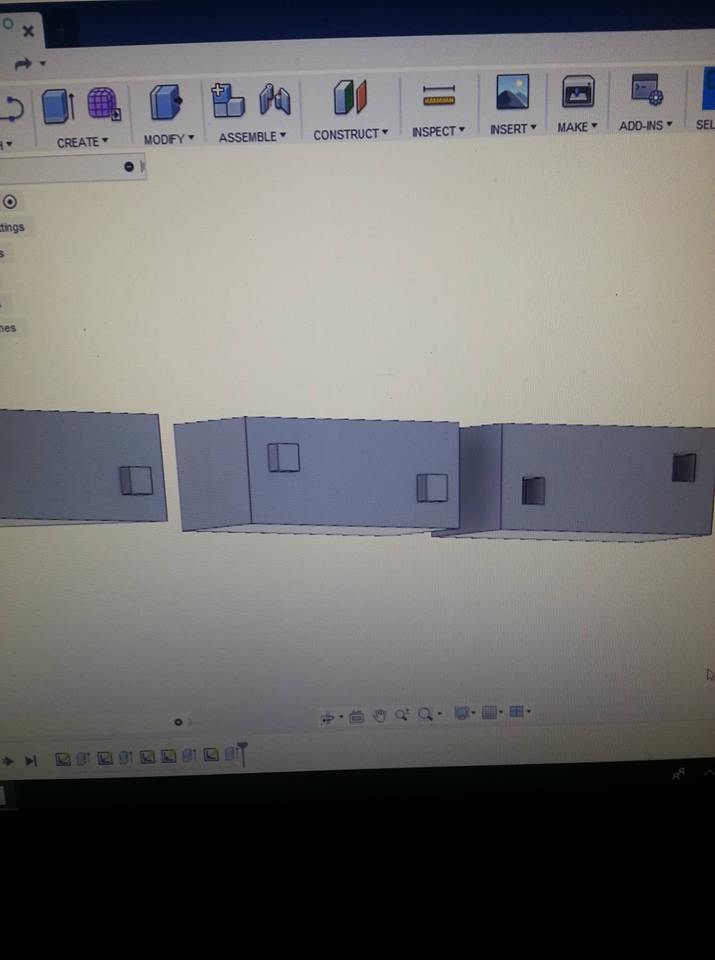
This is the printed version of the model I created.
More detailed explanation of the printing settings will be provided
on the next page (Soft Robotics)
FabLab Kamp-Lintfort, Ms. Adriana Cabrera, Soft Prototyping
‹ ›